Tuesday, December 13, 2011

Server Recovery


I recently completed a small change on the home server and followed it by a reboot. It never came back up…

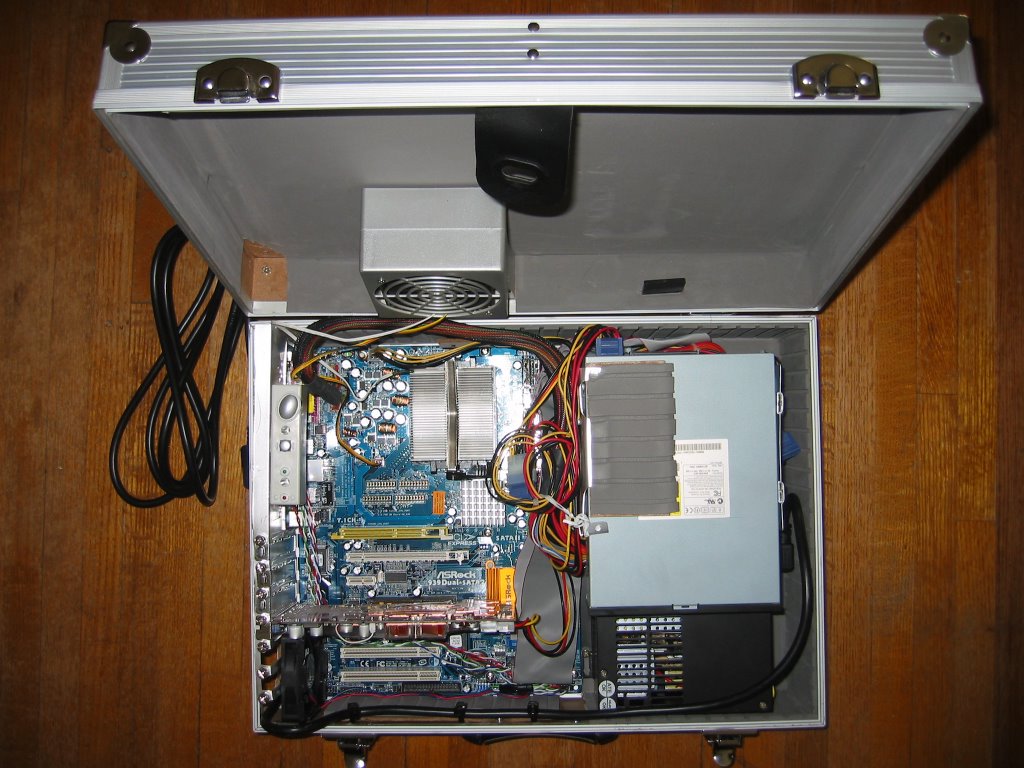
I was running out of space on the OS partition. It has been my practice to build volumes that do not fully utilize available physical space. In this way, should I run low on available space I have the opportunity to expand the volume to buy some time before a purchase is necessary. In this case I expanded the volume while maintaining 5GB unallocated on this drive. On reboot the server hung prior to post with a flashing cursor but no splash screen. I had taken a shortcut when assembling this box and did not connect the speaker so I could not hear the POST codes. This server has been running for 4 years without any hardware issues so a failure at this point was unfortunate - but unsurprising.

Isolating the problem was a matter of minimizing the variables. I disconnected all external USB, sound and network cables (leaving KVM attached) with no success. I disconnected all of the drives (4 HDD, 1 SSD, 1 DVD) and got the BIOS splash screen. At this point I suspected either the power supply or one of the drives. I didn’t have a spare power supply so I focused on narrowing down the drives. I mirror my data drives in a RAID 1 so I first attempted with just one of each mirror set and the SSD with the OS volume. Still no success. Removing the data drives with just the OS SSD attached. Still no success. Double check that it boots with the SSD disconnected, but doesn’t with only the SSD connected. Yep, I have a bricked OCZ Vertex 2 on my hands.

I had a spare 1.5TB HDD on hand and so put that back in the system. Fired up the Server 2008 x64 boot disk and launched a repair session. The complete PC recovery wizard found my most recent back right away but would not proceed with a system restore complaining 'The data is invalid 0x8007000d'. Assuming this generic message meant something beyond the obvious I hit the 'net. The first hint was a reminder that the disk target for restore needed to be bigger than the disk that was the source of the backup. In my case I the backup source was across 2 volumes on 2 physical disks: Drive C with the OS at 105GB and Drive D with the pagefile and applications with 900GB. I wasn't certain but adding a second physical disk wouldn't hurt. It still didn't work but did give a very slightly more descriptive error 'There is not enough disk space on the the system to perform the restore operation 0x80042408'. At this point it appeared the wizard wasn't going to give me the results I needed.

I followed the set of instructions provided here (modified for my environment - see the links at the bottom to explore the command syntax fully before applying these instructions to your scenario):
http://social.technet.microsoft.com/Forums/en/winserverfiles/thread/f15bfe2f-e265-479a-afa3-f055530c97f5

This stepped through the manual creation of first volume on the first disk via diskpart and the subsequent restoration of hit volume's data from the backup via wbadmin. As pointed out in a further post on the same thread the Server 2008 x64 boot CD does not have a Startup-Repair option so I needed to use the bootrec and bootsect commands to make the system bootable again.

At this point the server was fully recovered. Easy in the end but deciphering what the error messages presented by the GUI was not trivial.

Reference:
WBadmin syntax 
DiskPart syntax 
Bootrec syntax 
Bootsect syntax

Sunday, October 17, 2010

Ready to Ride

I've had 3 great rides since CTS.  Kelso with a great crew wishing Alex Bowling farewell from the dirt as he embarks on his cycle tour of points local and abroad.  Hardwood to revisit the last hardcore ride of last year.  Puslinch Lake to discover some new terrain.  DVP trails to welcome myself home and test the bike on its first ride after CTS with fresh pads.  Here is what my front pads looked like after the 2nd day.

In the meantime the steel hardtail has been a great understudy for the carbon dw-link full squish bike.  See the previous post for some fairly dramatic before and after photos of the Ibis Mojo SL.

Before and After

Before

After

Tuesday, October 05, 2010

CTS - My results

After crossing the finish line I knew I was later than expected and didn't want to miss the food, beer and camaraderie.  I packed the bike in the car filthy dirty, donned my jeans, Hakkalugi shirt, sun hat and real glass rose coloured lenses (none of this polycarbonate business that I've been riding with over the last 3 days) and headed back to the food tent.

A great BBQ and awards ceremony later and I was on the road home giving a ride to one of the volunteers who lived very close.  Fun conversation on his post-doctorate work in a nanotechnology lab at UoT to keep me alert on the drive and a welcome reception at home with fantastic curry to help me re-supply those depleted micro nutrients.

Results (http://www.cranktheshield.com/results.html)
Day 1 28/45 in the 30-39 male (my time 6h10m – fastest was 3h32m – slowest was 8h46m)
Day 2 28/40 in the 30-39 male (my time 6h31m – fastest was 3h37m – slowest was 9h22m)
Day 3 38/41 in the 30-39 male (my time 5h11m – fastest was 2h41m – slowest was 6h18m)
I placed 29th of 40 finishers in my category with a total time in the saddle of 17h53m – 167th of 211 overall.

Can't wait until next year's single day event where I can drag along all my friends and also participate in the charitable Paul's Dirty Enduro.  2011 may even eclipse 2010 for MTB greatness.

Pictoral evidence of my experience can be found here:
http://racedayrush.zoomphoto.ca/v5/event_gallery_search.php?frmIndex=140&submit=Search&event=13355&photog=racedayrush

CTS Day 3 - Handicap

Day 3 I woke up, ate a quick small breakfast and prepped my pack and bike.  I was going to ride. 

Enjoyed a beautiful, if cold, 10K neutral ride to the start of the 3rd stage at a ski resort.  I started near the back again to avoid slowing anyone up and then proceeded to pass riders up the hill.  Hooked up with Tom, a dinner companion from the night before, who was riding at about the same pace (he had missed the start and was trying to get up in the pack to riders at his level).  I anxiously completed the relatively technical (read – slow) downhill section by staying way back over the rear tire to keep it from losing traction and locking up - it was my only resistance to the force of gravity.  Since I wasn’t loading the front tire with braking forces my steering was super accurate and everything worked out fine.  This new approach to riding was fun!  Tom, my new ad hoc riding partner, knew we had a long paved section ahead and suggested we start a draft.  This would be a first for me but I knew the theory and agreed with excitement.  We started out and encouraged anyone we passed to join in if they could keep up.  In the end there were four of us taking turns in the lead and pushing really hard.  We were a freight train pushing past other riders seemingly effortlessly.  It was very exhilarating.  At one point Tom, feeling responsible for keeping the group together, looked back over his shoulder after giving up the lead position.  When he looked back to front he had gained slightly on the lead rider and their tires were now overlapping (meaning they could not move side to side without contact).   Unfortunately, the adage ‘look where you want to go’ applies equally to looking at what you want to avoid and since he was fixated on the lead rider’s rear tire he inadvertently yet seemingly inevitably moved into it.  I heard the rub and reacted to create space around Tom who was right in front of me.  Luckily everyone else close did the same.  Tom tried to correct but going down at this point was basically unavoidable.  He crashed  and slid hard on the pavement but as we all stopped he jumped right back up, checked himself and his bike and kept right on riding.  He even lead a couple more pulls of the group draft before we turned off into the woods.  Unfortunately he was forced to stop for aid before the end of the race and was unable to finish.  Thankfully he greeted me at the end all smiles – whew!  Further excitement awaited as I completed a fantastic swooping gravel downhill section (again, the Mojo is perfect for this) and had to pull up with a flat in the rear.  My guess is that since I was loading the rear tire to keep traction while braking I applied too much force and punctured on something that otherwise I would have rolled over without incident.  I run tubeless so I tried my first CO2 cartridge after checking the bead was still seated to see if it would self-heal.  No luck with that so I pulled off the tire and inserted my first tube and then used my last CO2 cartridge to inflate the tire and rode on.  Unfortunately I flatted again about ten kilometers later which I believe was due to rushing the first fix and folding the tube.  I located the leak, carefully inspected the tire at that point for any foreign objects, inserted my last tube and started to pump.  A passing rider gave me one of his CO2 cartridges to speed this process along (thanks Mike!) and I was back in motion.  The remainder of the race passed without further mishap but it was fairly slow.  I was running low on energy at this point and the trail had become muddy again.  The weather was gorgeous though and my spirits picked up for the very fun section that the organizers had saved for the finale of the race.  Crossing the start finish line was a relief.

CTS Day 2 - Waking Up

Waking up for Day 2 was not as difficult as I anticipated and prepping for the 3.5K neutral ride to the start was going well until my cabin mate mentioned that he had needed to change his brake pads after yesterday’s bogs.  Panic - calm down - deal with it - split second over.  I had not checked the condition of my pads until this point and discovered that the rear had worn unevenly and one side was completely gone.  Worse, a further casualty of my gear reduction while packing was the very specifically sized torx bit required to change these pads out.  The Trek Store tech had bits too large and too small and the Norco techs also did not have the correct bit until the manager dug a little deeper into his chest and found the right size on a multi-tool.  Fresh pads on the rear I headed for the start and made it just in time to push the bike under the start timing gate to scan my chip before they started tearing it down.  Whew!

Those of you paying attention will notice that I only changed my rear pads.  I run Formula R1 hydraulic disc brakes on the Mojo SL and they are far and away the best brakes I have ever used.  However finding stock of pads at the end of the season for these relatively esoteric units turned out to be more difficult than I had anticipated.  I had to resort to mail ordering a set of pads from MEC which worked out great except that I underestimated my needs and only brought one set.  This will matter in a moment…

Day 2 started with a good climb (http://connect.garmin.com/activity/49743019) which the Mojo is very adept at and since I had done quite a bit of training for climbs so I passed all of the short course (non competitive category) folks quickly.  Got some encouragement from the previous night’s dinner table companions on the way up and was rocking the first section passing the back of the long course rider pack.  Trail conditions were good and since we were on solid Canadian Shield rock the puddles were not muddy and you could roll right through most and just get wet – not muddy.  This was much better for the brakes but, unfortunately, since I had not changed the front pads there was still enough grit to finish off the work of day 1 and shortly I was riding without front brakes.  I kept my speed in check for turns and downhills so even the reduced braking force of only my rear brakes would still be sufficient to keep me out of the weeds.  I continued to make good time as the terrain was fairly wide open for the second half of the day and my legs were strong.  At one point I was stopped by a man on a mountain bike heading the other direction on one of the road sections when he asked:
“Where do you get into the woods”
“I’m not sure but I’m following these ribbons so I know it we must be on the right track”
“We? Ribbons?  Is this some sort of event”
“Yes <laugh> I’ve already ridden 50K!”
“What’s it called”
“Crank the Shield”
“OK, good luck and I’ll join next year”
I continued but doubt had entered my mind and there were no ribbons for quite some time.  As I was considering the odds that I had gone wrong and was not looking forward to having to climb all these hills to get back to a known good location when I spotted a rider stopped at the top of a hill ahead.  He saw me as well likely coming to the same conclusion (blind leading the blind) started off again in order to not give up his spot easily.  I gradually reeled him in, spoke briefly as I passed to confirm that we were indeed on the right path and then continued pushing along.  I found the key on these stable road sections was to keep my heart rate very near 150BPM to ensure I wasn’t burning energy too quickly but while still pushing as hard as my training would allow.  Predictably, when I was next forced to dismount for water he caught up.  We rode together in the great section of single track – normally I’m very fast at this style of riding on this bike but without a front brake I was taking it easy.  This rest pace allowed me to sprint hard from the 1KM sign and finish well ahead my impromptu riding partner.

A great dinner on Day 2 followed by some time spent attempting to source a set of pads for my front brakes.  No luck with Trek and even though Norco had called the nearest store in Bracebridge to send their entire inventory up only the Shimano models had sufficient supply.  All the others, Avid, Hayes, Hope, Formula, etc – were out of luck.  I now had to decide whether or not to start day 3 with a known mechanical weakness.  Time for a massage and some sleep before making any decisions.

CTS Day 1 - The hardest day

Day 1 was the hardest day (http://connect.garmin.com/activity/49742433 - note that the Garmin is about 10% low in estimating distance and time due to the tight nature of our path). 

We all started together (standard mass start) and spent most of the first half of our time in the field pushing bikes up muddy hills or through bog mud puddles in single file.  Everyone I was near was frustrated.  It opened up in the second half of the day which was much better but that’s when I started to chance riding through some of the easier mud traps.  A deep one stopped me dead and I was over the handle bars and into the mud.  This is where the spare set of gloves I was encouraged to pack came in super handy (pun intended) as my grip was suddenly compromised by all the goop 100% coating my hands past the wrist.   I also ended up falling on one knee in another puddle after a misstep and received my only big bruise of the event (luckily).  Without having done this before it was also very difficult to judge how I was managing energy levels on the first day.  However with so many dismounts fueling was easy so this did not turn out to be an issue other than a mental challenge (thanks Hammer!).

After Day 1 I cleaned the bike, lubed the chain and all was good.  The bike had performed admirably.  Great food at dinner and good conversation with other riders.  I got a couple more new trails recommended in south western Ontario in conversation with other cool participants and finished the day with a fantastic onsite massage before hitting the sack.

CTS: Packing

This took forever even though I’ve been planning for weeks. I had to dump some less likely to be used gear from the list in order to make everything fit in the slightly smaller test bag that I had at home.  The official CTS bag had more than enough room for everything I needed.  The biggest casualty here was my backup Camelback which would have come in really handy once I arrived at the start to discover that I had left my primary water bladder drying at home…  I had to make do with my fuel bottle (Hammer Perpetuem 2h bottle) and add my 500mL Kleen Kanteen for water in the pack.  This was sufficient to make it the roughly 20K between aid stations but really slowed me down as I had to dismount if I wanted to take water.  The let everyone I had just passed (yes, I was predominantly passing people as I purposefully started near the back every day) overtake me and meant that I found it difficult to find my own rhythm and establish a pace with the riders around me.  A side benefit was the break this gave me – my legs were always strong after a moment of rest while drinking.

My packing list based on the listed supplied by a CTS email update:

Riding Clothes:
3 regular jerseys
3 long sleeve jerseys
3 cycling shorts
4 socks (wool preferably - 1 wrapped in plastic bag for pak)
2 pairs cycling gloves (1 wrapped in plastic bag for pak)
Sun glasses + spare set + lenses
2x Shoes (1 or 3 would have been better - my second pair is lace up and pulled off in the mud on the 3rd day)
Helmet
Long pants for the neutral rides to the start of day 2 and 3.
Vaseline for the knees on cold starts
Cycling raincoat

Off Bike Clothing:
2x Comfortable long pants
Bathing suit that can double as shorts if warm
2x long sleeved shirt
Down vest
2x short sleeved shirt
3x underwear
2x comfy wool socks
Sun hat
sleep wear (long cotton pants and a soft t-shirt)
Shoes –can double with shower shoes- but will want them to be very comfortable and loose fitting
waterproof gloves (overkill it turns out)

Camp Gear:
Sleeping bag
pillow (actually I skipped this and used one of the long sleeved t-shirt stuffed with my down vest - much better!)
Towel
Shower shoes (see above, my water running shoes were perfect with wool socks for after the shower scene)
3x Plastic bags for wet clothes
Camera (I skipped this as well - see Race Day Rush for some captured moments)
Headlamp (very good!)
Garmin + charger (heart rate monitor made pacing much easier)
 
Toiletries:
Chamois cream
Toothbrush and toothpaste
Contact lense stuff (including spares)
Shampoo, Conditioner and soap
Sunscreen (very important for us redheads
Bug spray
Ibuprofen and methocarbamol flavours (Robaxacet - I assume no liability for this recommendation)
Lip balm

Spares bag:
spare brake pads (ouch - read more about this later and take multiple sets in the future)
2 tubes (whew! just enough)
patch kit
lube
chain in grease
pedals
shift cable
2x tires
spare spokes (a good idea that I didn't implement this time around)

Nutrition:
Hydration Pack (including bladder! argh!)
Hammer Perpetuem - put 2 hour servings in ziploc bags for mixing in bottle with water supplied at aid stations
Hammer Recoverite: drink immediately after finishing race before cleaning bike and possibly again at the end of the night to load and avoid cramps)
Clif Bars just in case - Chico does provide them at the aid stations.
Some sort of gel for when you feel a bonk coming on since you haven't been drinking enough Perpetuem
Trail mix before bed (Chico fed us so well that I didn't actually break into mine and am still working my way through it at home)
Electrolyte tabs (very important - with these I FULLY avoided cramps - whoot!)

On Bike Gear (some of this pulled from the above and some dedicated allocation):
camelback /w 1.5L water (more can be supplied at aid stations if needed)
water bottle /w 600mL solution mounted on bike (Hammer Perpeteum)
Electrolytes 12 per day (36 in total - but I forgot to take them regularly and it was OK)
Carb/protien powder (3x2x70cc scoop bags of Perpetuem) x3 = 18 in total
1 clif bar @ start of race + more at aid stations
Duct tape- bring a small amount to fix anything
Multi-tool
Derailler hanger
Quick link
Shift cable
2x spare tubes
CO2 kit (big cartidges if you can find them)
Pump
Patch kit /wTire levers
Phone
ID and health card
$20
Spare socks and gloves in a plastic bag
Rain jacket - if this won't fit use a small vest - if this won't fit adapt a plastic bag :)

Crank The Sheild event report: Not as difficult as working for a living and much more unique.

I've just completed a most challenging event that I've been prepping for since either August 2009, March, or July of this year depending on how extensive you need to evaluate 'training'.  Many thanks to first Sandy for riding with me while I re-kindled the MTB flame, my cousin John for encouraging me into the full CTS experience, Alex for polishing my training in hardcore style, Luke @ FITS for kicking my hamstrings into high gear, Claire for supporting my distraction, and myself for reinforcing that hobbies like this are especially worthwhile due to being both enjoyable and healthy.

Overall this has been a fantastic experience.  For details on the 230KM mountain bike race and how it stacks up in terms of commitment refer to the offical site here: http://www.cranktheshield.com/  In subsequent posts I will details the phases of the event.

Friday, September 24, 2010

Avoid the Facebook

Forget the big sleep.  It appears that bmused is not headed for /dev/null after all as it's been quite awhile since my last update and not only is it still here - I still have access.  I'll be posting shortly with some recent mountain biking exploits.  I'll follow the event summary with some commentary on my training as it has been a great learning experience out on the trails, in front of the keyboard and under the guidance of some great health practitioners.

Tuesday, February 26, 2008

Avoiding the big sleep

Wow, almost two years since the last post. I'll try to make sure that doesn't happen again so this blog doesn't die.

It's been a good year and I'm going to need to start somewhere so I'll finish off the last post to close the loop.

We chose Marmoleum as the floor material as it is a natural product and readily available in our neighbourhood for a reasonable price. It is reasonably easy to work with (we did the install ourselves) and is very durable. Tearing up the old floor tile wasn't too bad and we put another layer of 1/4" plywood down to level the floor and compensate for the lower profile of the new flooring. We luckily could complete the entire bathroom in one sheet with a hole cut out for the toilet pumbing and so should not have any issues with waterproofing. The sink did come from Ikea as I'm a splashy shaver and wanted the wide basin. The tap was a great find on a discounted closeout model from Canadian Tire that we're very pleased with. The city of Toronto subsidized almost the entire purchase price of the low volume toilet we installed. The wall tile we left in place and painted white with a dark chocolate (Mink) stripe circling the room. The Melamine re-inforced paint seems to be holding up well one year later with only a couple chips that do not detract from the overall effect. I am pleasantly surprised with the effect produced by this paint on the embossed tiles--subtle texture like a pressed tin roof. Making up for the low flow toilet is the luxury item: a rain shower head. It's enormous and can produce a wide range of output, from a high efficiency massage to the full flow gentle rain. I admit that it spends most of the time on this setting. New value cores everywhere to stop any leaks (required for the sink re-plumbing).

The item that required the most research is the under sink heater. I don't like waiting for hot water as it is not very luxurious and very wasteful of both water and energy. Installing a 2 gallon hot water tank at the point of use reduces the wait for hot water to about a second and reduces the lost heat energy and wasted water flow immensely. It was a pretty specific scenario that made this work. If this was not a frequently used sink it would make less sense as you need to keep this tank warm and it's electric heat. If it there were higher volume requirements then this couldn't keep up. Both of these issues are solveable by larger, optionally gas powered units and even better by intant on heaters but they were more expensive than required for this installation. The one we chose also came from Canadian Tire and was somewhere around $200. This single item is probably the best part about the new bathroom.

More posts to come.

Labels:

Tuesday, February 28, 2006

Boomin' Bathroom

Next Project!

We need to resurface the floor the bathroom at it is no longer waterproof. The simplest solution would be to simply re-grout the existing tile. However that's not exactly an easy task and we're not really happy with the tiling job, plus the toilet and sink have to go. Sounds like a project to me :).

We're likely going to use linoleum for the floor surface. It's simple + fast which is important as we've only got 2 vacation days + 2 weekend days to complete the task and have never installed ceramic tile before. It's expensive per square foot but we're not looking at a large area so the $ are not as important and the prep and installation time. It will also be easier to manipulate under the new toilet and sink cabinet.

The accent colour of the existing tiling is robin's egg blue. It looks good if you like heritage colours. The tub and toilet match reasonably well and are solid colours. The sink unfortunately must have been chosen at a different time as it is blue--but not the same blue and a really terrible marble imitation. It looks awful. It will be a real relief to get rid of it. The leading contender for a replacement at this point is the Ikea HÖLLVIKEN. Simple and available in 80x55cm which should fit perfectly in the space vacated by the current monstrosity. In typical Ikea fashion they tell you it needs the ATLANT water-trap, ILLERN faucet with strainer, VÄTTERN wash-basin cabinet frame, CAPITA legs, and VÄTTERN MOREN door. How very efficient.

Toilets we'll leave for a different day.

The luxury item and reason I start this posting is the search for a new hot water solution. At the moment it takes such a long time for hot water to appear at the faucet that we usually give up and just use the cold tap to avoid wasting too much time and water. Not exactly a luxurious experience. I've been researching the various local heating solutions (tankless, mini-tank, recirculation pipes/pumps) and it seems that our path will be guided once again by price and ease of installation. A mini-tank will work off the nearby 120V 15A circuit with minor mods (a short run of wire and an under sink GFI outlet. I'm a little uncertain exactly what is the minimum required capacity for a house that generally houses just 2 people but since the smallest one I can find for sale online in the Toronto area is 1.5 gallons from Sears.ca (Kenmore ® 6.8 L (1.5 Imp. gal.) Point-Of-Use Electric Water Heater) and Canadian Tire has a 2 gallon model for $10 less (Space Saver 10 L (2 gallon) for $179.99) I'll assume that's the range to look for. Some of the more contractor oriented site I was browsing were selling various 4 gallon models so I'll consider that the top end (eg: Stiebel Eltron - SHC Min-tank Water Heater). Now to find some local shop that is willing to sell me something decent and give me some advice on avoiding installation pitfalls.

Let the fun begin!
edit: here are a couple shots of the finished product - 4 years later :)


Thursday, January 12, 2006

Evolution

The case has seen some adventures and proven very reliable over the intervening months between my last post and present day.

A LAN party where we had enormous amounts of fun in a newly aquired finished basement. Best Case-Mod Award!! (Photo credit to Wiarton Willy):

Whoot!! I think I said something like "never have I gone so long and so hard" at the time.

In my quest for lower temps and power consumption I wholeheartedly support AMD's Cool and Quiet technology (CnQ). One of the early production bios versions for the MB supported a low end CnQ Vcore of 1.1V. Compared to the stock 1.35 this is great. Unfortunately the lasted official bios versions only utilize a 1.3V CnQ Vc. When OCworkbench, hosts of an active Asrock enthusiast community, released their latest beta bios supporting a CnQ Vc of 1.1V I decided to take the plunge. I'd resisted in the past as the system doesn't have a floppy drive installed (I felt I wasn’t' worth the effort--perhaps I was wrong). Fortunately I now have a USB key in the house post Christmas (whoot! again). Using one of the various methods to make the USB key bootable (XP's bootable floppy from a different system, a copy of the flash utility and bios and HP's Drive Key Boot Utility) and selecting it from the boot menu soon had me upgraded. Unfortunately OCworkbench seems to have selected some options in the bios (some altered defaults and possibly some hidden options) which my system didn't like very much. It wouldn't boot. On further investigation it appeared that it may in fact be attempting something as the keyboard lights would flash as in a normal POST (power on self test) sequence but no video would display. Removing power source and battery from the MB didn't help. Resetting the bios with the CLRCMOS jumper didn't help. Multiple resets didn't help. However pressing F2 to get into the bios did (whoot again!). I then attempted all defaults and forced preference to the AGP card for video initialization. Still only mediocre results (successful video initialization and boot 1/3 of the time). I decided to boot to windows and using the factory supplied windows bios update utility v1.5 to get back to a supported system. No problem and now the system is back to normal.

However I still wanted to take advantage of the fact that this chip likes low voltages. The 1.50 bios uses the CnQ Vc of 1.3 on the low end. I decided to disable CnQ but determine the lowest voltage that the system would run at full speed without sacrificing stability. After attempts at 1.1 (wouldn't even boot windows) 1.2 (pretty flakey right off the bat) it seems that 1.25 is the final answer. I've been running Prime95 to verify stability on both cores and the temp is solid at 63 degrees C compared to 79 degrees C at 1.35V. Pretty impressive gains in power efficiency.

I thought I'd post this article to counterbalance the MANY articles out there describing efforts aimed at maximum performance. I've not had much luck getting this system to overclock by a significant amount and this reduction in energy consumption is much more rewarding to me. This system flies regardless and now has a smaller energy/heat/noise signature to boot. A fantastic HTPC candidate.

Monday, November 14, 2005

Fin

The finished product:


The only holes I cut in the case:


Once I enabled the bios option to power on via the spacebar I don't even have to crack the case unless I need to use the optical drive. As this doesn't happen very often I'm quite pleased with how this worked out. I ran a stress test (cpustabtest.exe works the CPU hard in an effort to max out the thermal envelope) while running a defrag and scandisk of separate partitions on the HDD (I could sacrifice the OS install if the machine hung during the stress test) and the max temp of the CPU stabilized at 69 degrees after about 20 minutes and stayed there for 40 minutes until I called off the test. That's a little hot but it was perfectly stable and I'm not really worried about it. If the opportunity presents itself I'll install a better heatsink with more fins but the fit will be tight between the socket and the ducted fan mounted from the lid directly above it. It's not as quiet as I'd like as the CPU fan was repurposed to draw air in from the expansion card slots upstream of the video card and it is no longer speed controlled by the motherboard. Air is also directed by the GPU fan towards the power supply. The power supply fan pulls air through itself before being forced up along the case wall and back over the HDD (mounted under the the optical drive). Finally the air gets a chance to exit the case via the CPU heatsink and associated fan duct. It's a very effective solution but I think I'll source a quiet fan (another SilentX there would bring the installed total to 3) and then I'll be much happier keeping the case on my desk where I can see it but not hear it :).

A great stealth solution. Can't wait for the next LAN party.

Thursday, November 10, 2005

Focus

There is nothing like a computer down to galvanize me. I'm not saying thats a purely good thing as sometimes you need to let go but it is good to know what motivates you.

In this case I couldn't post to the blog (easily), check email (while sitting down), play Q4 (at least not at home) or have the satisfaction of knowing this project was going to work out. I'm referring to the BriefCase of course. I made it as far as I could with the old MB as a template before having to commit, tear down the new PC and make sure that all the bits would fit with no interference. That's basically the point of no return as I'd already built that machine once only to pull it apart for this project--I certainly didn't want to do it again just because I wasn't making progress on the new case quick enough. Time to focus.

I forged ahead and am pleased to report that I'm posting from the newly assembled 'portable' workstation. Portable becuase I just took it upstairs all latched up and showed my partner Claire my handywork. She was suitably impressed. Unfortunately I'm now very tired and so won't be pausing to take any pictures of the current state of affairs. That's OK as I'm not actually quite done. I need to mount an exhaust fan somewhere so that it doesn't boil slowly (quickly?) in it's own juices if I were to shut the lid (it's running wide open at the moment.

I did manage to take some in progress pictures last night but was unable to post them. Here they are. You be the judge--did I make good time?

The MB tray in the box:


The donor aluminum case I picked up for $35:


So far the ATX support and drive cages have been pillaged. I'm uncertain if I'll use the power switch assembly but it did come with a ducted fan that looks like it will suit this application well.

I'll post tomorrow when I can prove that it will run safely with the lid latched.

Monday, November 07, 2005

BriefCase

Q4. I knew it had to happen. I tried to prevent it. My existing system could play it and it would still be satisfying -- really! But Q3 just runs so fast now and regardless of how much I'm impressed that Q4 runs faster than D3 on the same hardware my expectations were high and playing on 'medium' just wouldn't cut it. I need to crank it!

Unfortunately (fortunately?) a small amount of good luck, a large amount whimsy, and a healthy (hopefully - see the bit about good luck and think $$) obsession with computing technology resulted in a recent purchase. Some new PC components which when assembled in the right order should result in a fast and appropriately geeky box.

The Recipe:
1 geek who cut his teeth on a 8086, a 286-386 upgrade courtesy of some highjinx at school, a 486 polished further than it deserved, a 586 that said geek was determined to run without a fan, a dually 686 that really reinforced this whole mod fascination (go bp6.com) but is now far to ugly a solution to ever let anyone else touch, an entirely too vanilla K7, and the recent acquisition of an A64 X2.

It had to happen. That BP6 kicked ass 6 ways to Sunday but was a really high maintenance machine. This X2 business makes operating a dual proc machine entirely too easy. I've got an idea. Let's 'take advantage' of the opportunity afforded by a bulk buy on the part of Home Depot and purchase a snazzy aluminum tool case ($20!) and mod it into a pimpin' portable box. Should be quiet too with all that padding :).

The Proof of concept:

Wednesday, October 26, 2005

Meme & Data

Mom and Dad, if (when) you read this and decide to comment (I encourage it) choose a pseudonym other than Mom&Dad. 3l1teH@xors, Meme&Data or something with 'brae might work if you are looking for suggestions :P.

Tuesday, October 25, 2005

Growth

Seeding, germination, fruition and harvest; can you tell I spent some time at the farm recently?

Monday, October 24, 2005

Self

A blog has always struck me a little self centred. Not that that's a bad thing as many of us could use a little self attention, self care, and self expression. It seems on the surface that the latter item is the point of a blog but for me it's about the exercise of self expression to promote self attention and hopefully self care in ourselves and our audience. I know that other bloggers have prompted me to the examine and change my behaviours to my own benefit and hopefully to others as well. A worthwhile effort.

A blog is somewhat riskier than a diary. A diary is generally believed to be the private property of the individual authoring the document. An audience of one. A blog has by nature an audience of at least one, and at most the entire population of the earth (perhaps beyond?). Certainly a public forum, a soapbox in text form. I've never felt the need to record my thoughts in a diary. Perhaps the self awareness it would afford didn't seem worth it--although that directly contradicts some of my more conscious beliefs about self and an individual's impact on the others.

I think small. A small improvement or impression in one direction can yield grand results when allowed to grow to fruition. Good ideas need room to germinate. Perhaps that's the point of a blog--or blogs en mass. Many small good ideas tossed out so that the particularly good ones will stick.

Certainly the people I know who blog have many good ideas.

The fact that I'm bloggin' means I think there is a point.

Will the effort will prove to be worth it?

We'll see. I think it will be.

Feedback is welcome. I'm more engaging in a conversation than a monologue.

[Ironic that when I spellcheck this entry the word 'blog' shows up as suspect.]